Bay-Area arts organizer David Solnit has been making art for protest movements for decades, and has established a practice of simple, reliable techniques for amplifying messages in the streets. I’ve condensed (and lightly edited and added to) a few of his resources in this blog post, and hopefully I’ll be following up with some more tips from David and other powerhouses of protest communication and props. These tips work really well with downloadable graphics from our graphics page here at Justseeds!
Our art and visuals can tell our story to those who see us or through media, make our actions more powerful, lift spirits and hold our space. It’s also a good way to involve folks, build momentum and have fun. Sometimes photos or even media coverage of an art build party can help get the world out. There are many ways to use images and slogans to get your message across.
COPY AND PRINT: download, and email to yourself or put on a flash drive and go to your printing place (like FedEx) or find out who you know who has a color printer or access to color printing. Make color copies (or black and white copies-depending on design) on 11×17 or 12×18 (if that is an option). It’s ideal if you can get cardstock or a heavy paper, or you can also mount them on cut-to-size posterboard/cardboard/etc using spray adhesive, glue stick, or tape around the edges.
ENLARGE AND ASSEMBLE: One way to make a larger sign is to enlarge the design onto two sideways 11×17 sheets, cut and paste together on a rigid backing, to make one bigger 17×22 inch sign—or do it in 4 sections and make it even bigger.
ADD ELEMENTS: you can add a colored paper or painted border, use colored posterboard and leave a border, or add a not-too-dark color wash(watercolors or watered-down latex/acryic paints) to back and white designs.
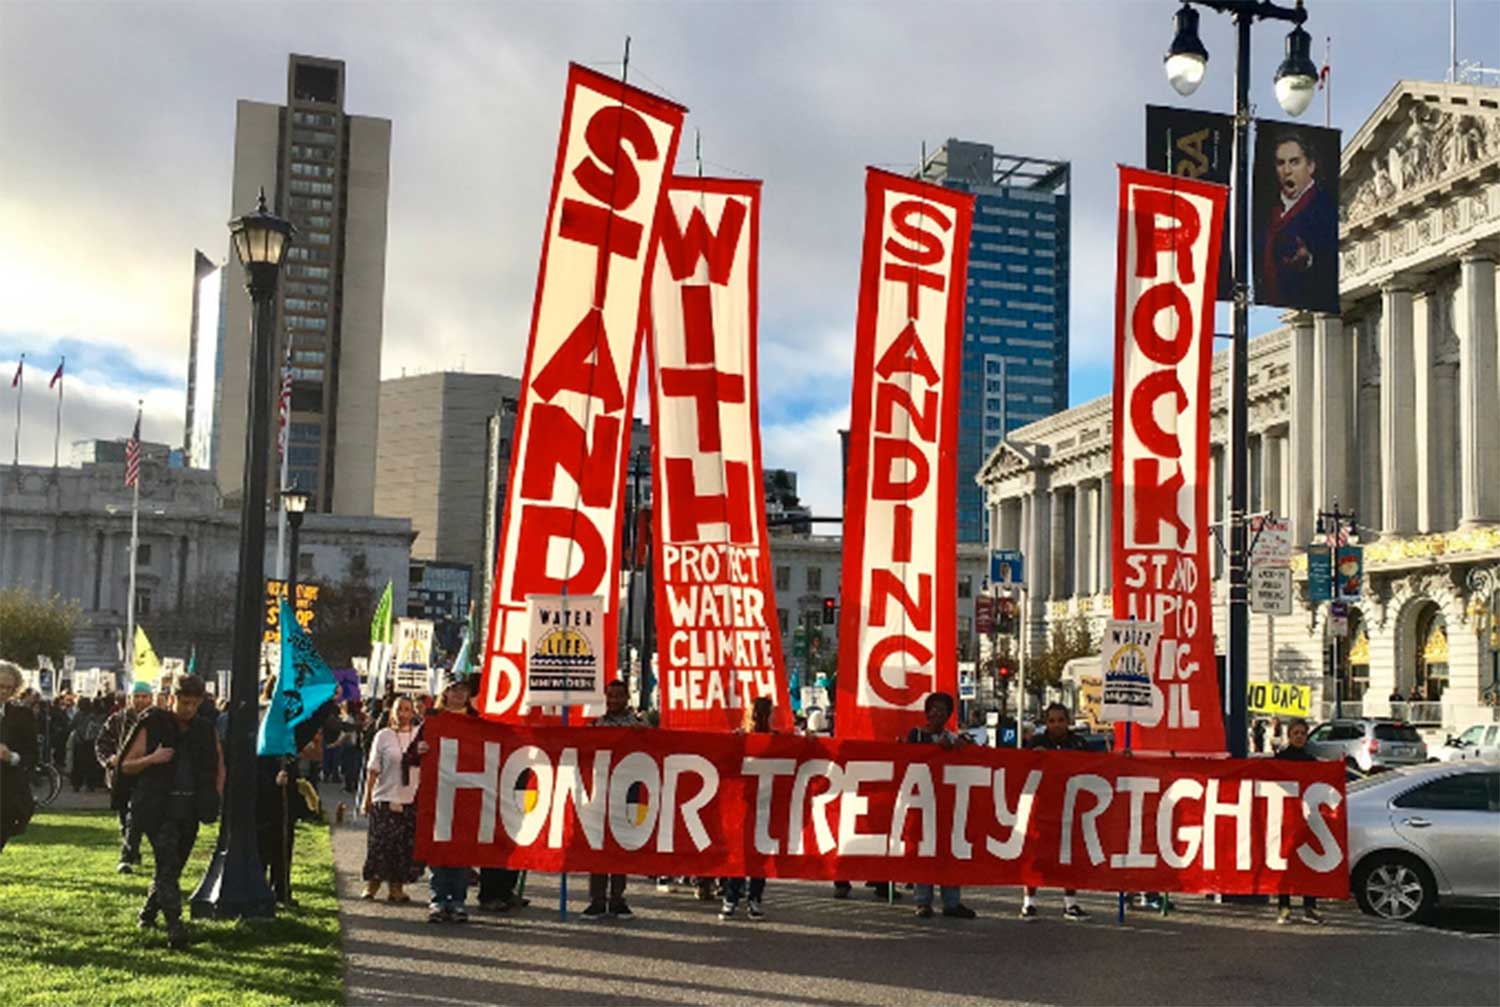
One great way to use images and slogans is to get them onto CROSSBAR FLAGS.
These painted, stenciled or screen-printed fabric flags are designed to have horizontal sticks at top and bottom, and also attach to a vertical pole. They are very visible, and easy to carry.
Here’s how to make one–or many:
1) GET AND CUT FABRIC:
Choose a lightweight muslin, cotton, polyester or other lightweight non-stretchy white fabric. White sheets are also good, and damaged ones can sometimes be had for free from industrial laundry companies. Cut–or tear after an initial cut–to size. I usually make these flags about 24 x 40 inches, allowing 6 inches to wrap around the top/bottom sticks. You can adjust the flag size to make best use the of size of fabric you have. One reason I choose a light fabric is so the light will shine through if the sun is behind the flag.
2) STAPLE/TAPE DOWN:
I create a painting table with a sheet of not-too-rough plywood placed on top of a table or sawhorses, and then staple the flag fabric to the plywood in four corners, pulling it tightly so there are no wrinkles. You can also do this with masking or duct tape.
3) DESIGN/LAYOUT: Draw your design — first on paper, then on the flag fabric. TIPS: Less is more; keeping to a few shorter words and simple bold images makes it stronger and easier to read. A light/dark contrast makes it readable. One option is to paint a light color over the whole flag, priming it, let it dry, then draw your design and paint with much darker colors.
Remember, the more complex your image, the more time it will take. Using a straight edge, mark the top/bottom edges of your words. If you need help spacing, count the number of letters in each line and dividing in ½ and ¼ guide for where they go on the flag.
4) PAINT: I paint flags and banners with latex (water clean up) house paint. You can also use artists acrylic paints. Don’t use tempera paint–it smears easily and runs if it gets wet. I put the paint into a plastic container and thin with water a bit to make it flow–easier to paint with, but not so much it bleeds or looks thin. Let the flag dry, then pull it off the plywood. NOTE: you can also choose to screen print or spray-paint stencil the flags, maybe adding a handpainted element too.
5) ATTACH TO STICKS
I use wood lath, narrow wood strips (1 1/2 x ⅓ inch) like was once used to back plaster walls and is now used for fence trellises. You can buy it either for fence lattice and garden trellis or for plaster walls. A clear (no big knots) 2×4 can be ripped on a tablesaw. But, you can use whatever you can get. Cut the stick an inch shorter than the fabric, so it’s not visible or sharp. Us a staple gun to staple the edge of the fabric to the outside edge of the stick. Roll the stick over twice and securely staple the fabric to the stick. Use ¼ inch staples–or just shorter that the wood thickness, to avoid sharp edges. Do this at the top and bottom. Then get your vertical flag pole; I usually use 8 foot tall, 1×2 inch “furring strips” making sure they don’t have big knots that might break while carrying. I get 3/4 to 1 inch washerhead screws, or wood or sheet metal screws, and use a cordless drill with a phillips bit to screw the middle of the top and bottom of the flag sticks securely into the vertical flagpole. I either assemble them onsite to make transport easier or else bundle them up 4 -6 per bundle for transport and carrying to site.
6) CARRY! Are they in the best place and facing the right direction? Do you want them to move as a line or groups of flags, or with some choreography? They can be a powerful visual positioned right behind a hand-held banner people hold below their heads.

There’s some further tips on how to make these flags and also how to paint GIANT BANNERS and more in this great 12 minute video featuring David and a crew of artists and activists at work.
Here’s a variety of forms of visual art that have been produced with groups for actions and demonstrations:
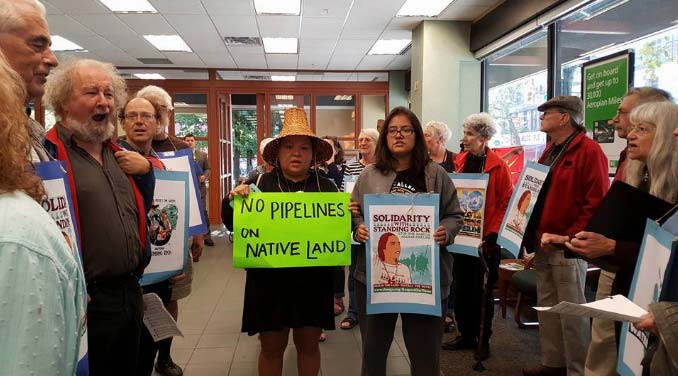
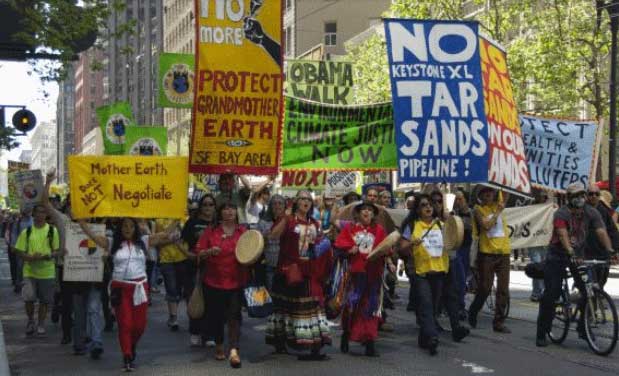
HAND HELD SIGNS: signs with a picket stick that people hold in their hands—these can range from 11×17 copied/printed to hand made, screen printed or printed cardboard, yardstick, fabric. Making them beautiful, colorful, visually strong, simple and including color and images can really help the event come more alive.
PICKET SIGNS: Any kind of sign on a stick or pole—cardboard or yardstick are most common. They can be made in the shape of a relevant image.
BANNERS: Fabric horizontal banners with printed words and or images can be hand held below head level or held overhand on two (or more for longer banners).
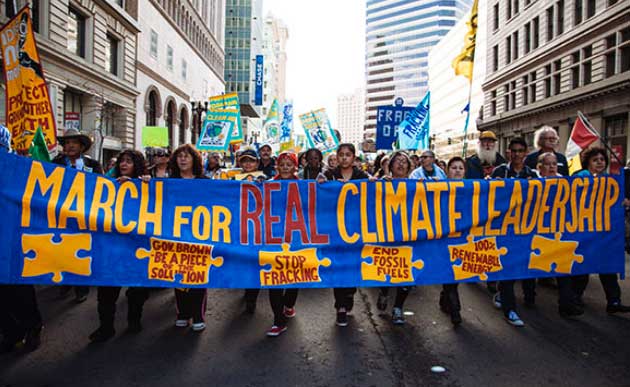
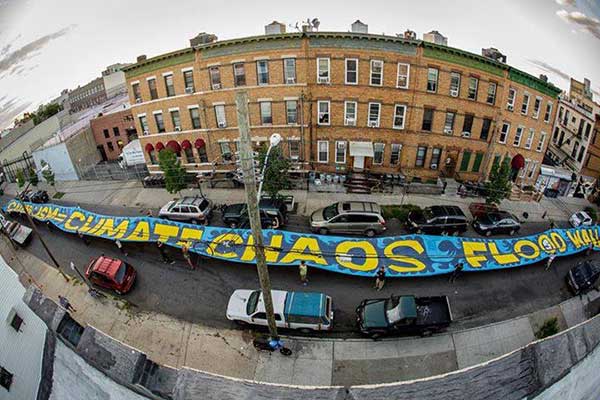
GIANT BANNERS: Long banners from 16 to 100 feet long have repeat images or messages or a long message and/or image. It takes more folks to hold and can be tough if windy, but can also really visually have an impact.
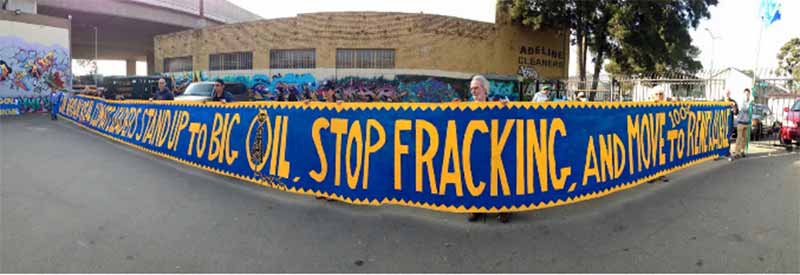
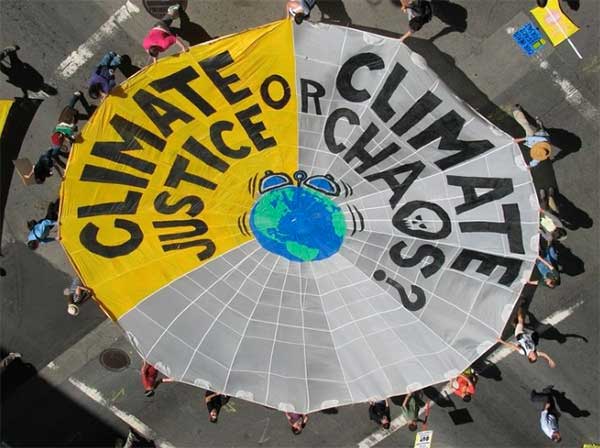
GIANT HORIZONTAL BANNERS: Wide and often long banners held horizontally so they are visible from above and at the side can help colorfully hold and occupy streets or space, be energizing for those carrying (put an earth ball in and it becomes a game of moving the ball around and trying to save it from falling out). These can make for great photos from above, or from underneath.
PARACHUTE BANNERS: messages and or images painted on a “play parachute” which come 12 or 24 feet on white nylon. Strong space/street occupying visuals and great for games (and for kids). Can offer a bit of sun/rain protection for those underneath.
VERTICAL BANNERS: like the “Crossbar Style Flags”, but bigger and often haunted on bigger taller poles—bamboo or wood. They can be very visible above the heads of a march or rally, but can also challenging in strong winds.
FLAPPING FLAGS: painted or screen printed, often on light nylon fabric or other fabric that catches the wind easily. They can be mounted on wood, bamboo or even telescoping-extending painting roller poles.

BIKE BLOCK FLAGS: Bikes can be adorned with flags (they always flap visibly when riding) to add a mobile and dynamic visual element. Bike flags can be painted or screen printed on fabric.

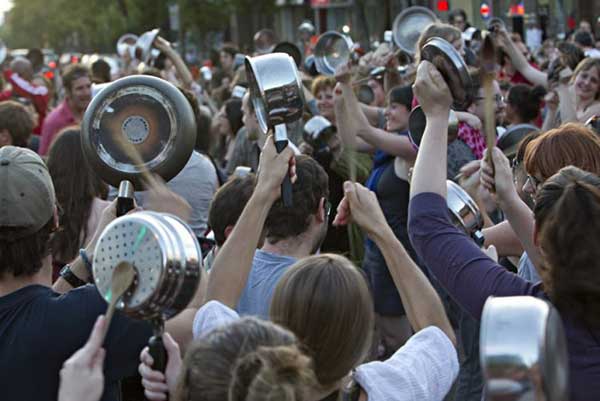
ACTUAL OBJECTS: Marchers carrying real sunflowers marching on an oil refinery. Teachers mobilizing to a school board meeting demanding a decent contract carrying actual shovels painted with the words “TEACHERS DIG DEEP,” “TEACHERS CULTIVATE.” Argentines, Icelanders and others have marched with everyday kitchen pots/pans and spoons as both noisemakers and household symbols of ordinary people. People commemorating a murdered activist carried roses to lay at an altar in front of the building of the institution that murdered the person. People carry actual household brooms and mops to tell Chevron Oil to ‘CLEAN UP” it’s mess. That actual object can often be more powerful than an artistic representation. The world of protest is your oyster!
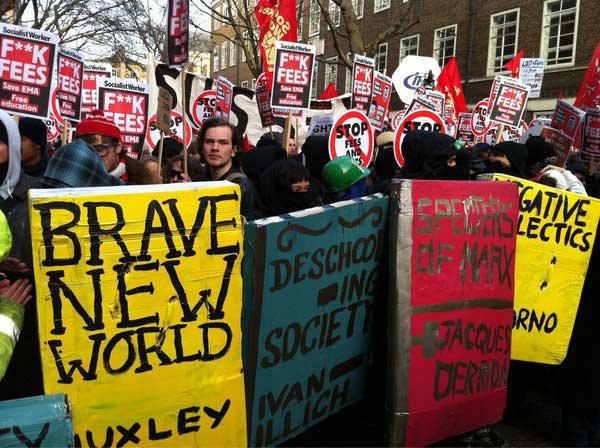
Lastly, and from Roger, not David: SHIELDS: Sometimes you might need to defend yourself or your friends in a protest context. One protest used 3′ x 4′ scale models of book covers on thick, reinforced cardboard with handles on the back as both props to communicate good reading ideas and tools to defend against attack.
See you in the streets!

STANDING ROCK SOLIDARITY ART KIT
https://docs.google.com/document/d/1hmEiK2S7vh4oVRuv6LFK7PluCAc8ayfZ_8l-nCoz1KA/edit
RESIST CLIMATE DENIER CABINET; ART & VISUALS MAKING KIT
https://docs.google.com/document/d/1h7eR2k65PqluFhICzbrqnDb0t-F6RV9eGoMhvBrDs2U/edit
Thanks Roger Peet for this lovely write up and shout out!
NOTE: The book-shields are not something I have made or used, they are Rogers addition.
The book-shield idea came out of “book blocs” in Italy and the UK in 2010.
Here is a youtube how to
video:\https://www.youtube.com/watch?v=0pAea8o__b8
can I add MIRRORS?!
Mirrors held by people in the front of a march reflect the faces of the Police back at themselves.
😉
I have made signs that include mirrors. Working with families facing foreclosure, we interrupted auction of foreclosed homes and held mirror signs to the auctioneer and buyers. To avoid possible breaking glass hazard, I used adhesive caul to attache the mirrors to cardboard, which we made larger and pated yellow and pasted our message on it. Recently water protectors at standing rock have made mirror shields, using a non-breakable adhesive mirror-like material. Here is their how to:
https://vimeo.com/191394747
[…] List of resources for using art to amplify public protest Link […]
will you have anymore sign making events for the water protectors
Great ideas and guess what… It actually helps make people conscious and aware of the issues and how people can be kf ser ice to the EARTH AND ALL LIVING THINGS!
I just discovered your site and I love it!
I am going to learn how to screen print now.
I grew up in SF. I now live north of Atlanta.
I have the Bay area activism in my blood!
Thank you for sharing!
Fantastic! Hope this was useful!
Banners of any size are easily traced onto cloth by using a projector with computer to project any image you want to use. We do this in our basement, hanging the cloth (we use painters ground cloths –4 foot by 12 foot, or what ever you have. Trace with pencil or marker, then put on floor to paint with brushes.
Sometimes we hold our long banners with PVC pipe. Easy to put grommets in the canvas.
Great stuff! This will be a wonderful benefit for all of those progressive activists!! Thank you!!
I’m encouraged by the No TAV protests and would like to make a No TAV Banner, but I am not very art savvy and cannot print either, and the ones they hold up in the pictures all look professionally made. Do you know how they do it? Also, Roger, the one you shown at the end is brilliant.
One easy way, if you have access to a projector, is to put the text you want in photoshop or something and then project it onto a sheet or banner- trace it, and fill it in with whatever color you like!